Have you been considering installing a solar panel on your property lately? Well, you’re not alone. According to recent statistics, over 30% of Australian households have roof top solar PV.
The demand for solar panels among Australian homeowners is a result of the ever-growing cost of electricity. Besides, this energy source is easier on the environment.
Another great thing to love about solar panels is that they’re surprisingly easy to install.
This article offers a comprehensive guide to solar panel installation.
Getting Started
Preparation is a key step in solar panel installation. And much of this step entails finding a suitable solar panel technician.
The good news is that Australia teems with professional solar installation companies like Reposit Power. Little research is all it takes to hone in on a credible technician.
First, insist on a solar panel installation technician with a proven track record. The company must provide a list of some of their previous clients. You can then contact these individuals to find out more about their experience working with the technician.
It’s also best to prioritize companies with experience in installing different solar panels. Last, but not least, ask for proof of licensing and homeowners insurance. The latter will cushion your property from any structural damages caused during the installation process.
Picking the Right Solar Panel System for Your Home
You probably already know that solar panels come in different sizes. So, what size suits your home?
The best formula for determining the right solar panel size for your home is to add up the wattage of all the electrical gadgets and appliances you plan to use with the system. Then, calculate the number of hours per day that these appliances will need to be powered.
Now, furnish the identified solar panel installation technician with the above information for recommendations of the right solar panel size for your property. The information will also dictate the required battery capacity and wire gauge.

Understanding Solar Panel Components
It doesn’t matter the size of a solar panel suitable for your property. The panel will require certain parts to function effectively. Below are the key components of a solar panel system;
1. Solar Panel/Photovoltaic (PV) Panels
This is the most important component of a solar panel system. It comprises 60 or more solar cells, which work synergistically to trap sunlight and convert it into useful electrical energy.
There are different types of panel designs to choose from. Common options include regular, monocrystalline, polycrystalline, shingled, and half-cut panels.
2. Solar Batteries
Solar batteries store the electrical energy harnessed from sunlight, releasing it as required.
3. Solar Inverters
Like regular inverters, solar inverters convert direct current (DC) electricity into the more useful alternating current (AC) electricity.
4. Smart Controllers
These are optional gadgets that passively monitor energy consumption by the connected devices and control the amount of power that flows through to them.
Preparing the Installation Site
A solar panel installation company may conduct a previsit to your home to prepare the installation site. Much of the preparation revolves around roof assessment.
The technician will assess your roof to determine if it can safely hold the weight of the panel. Older roofs may need to be repaired or replaced before installing a solar panel on them.
The solar installation company will also measure the roof’s size and inclination vis-à-vis the solar panel selected. If the roof is too small or poorly-angled, the technician may recommend alternative mounting surfaces.

Installation Procedure
The actual procedure for installing a solar panel on your property may vary depending on the technician and your roof’s dynamics. However, a typical installation process unfolds as follows;
1. Technician arrives on site
It’s important to be around during the installation process. This allows you to inspect for any property damages before the technician leaves the site.
2. Technician puts on the necessary PPEs
The technicians will put on their personal protective equipment (PPEs) before getting on the rooftop. These include safety boots, helmets, goggles, etc.
3. Erecting a ladder
Depending on your roof’s height, the solar panel installation technician may need a ladder to get to the roof.
4. Installing the racking system
A solar panel’s racking system anchors the PV panels in place. To install the racks, the technician will need to drill directly on the roof.
5. Attaching MLPEs
Module-level power electronics (MLPE) are solar panel components that optimize the PVs’ performance, such as microinverters.
6. Setting the PV panels
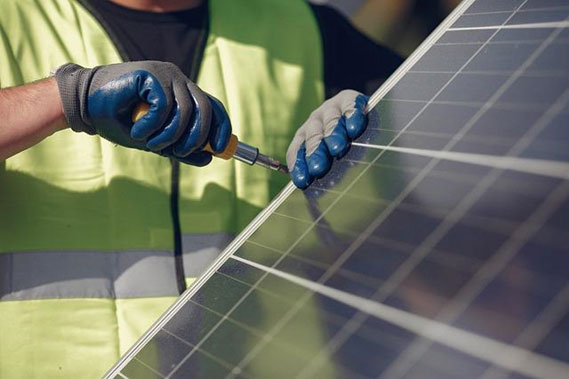
Right after attaching MLPEs, the technician will attach the solar panels directly onto the mounting rails. This basically involves tightening the nuts and bolts.
7. Electrical wiring
The installation technician may opt for a series connection or parallel connection, depending on the voltage requirements. They’ll then connect the positive and negative wires from the solar panel to their respective terminals in the solar converter.
The next part of wiring entails connecting the solar converter to the solar battery. Lastly, the battery is wired to the grid input.
The installation process is now complete. You can wait a few hours for the solar panel to charge and then plug in your electrical appliances.

Summary
There goes our definitive guide to solar panel installation. As you may have gathered, this is a fairly intricate process that’s best executed by professionals.
Solar panel installation companies can help you pick a suitable PV panel for your home and advise on the right mounting location. Some of these technicians will also offer handy advice on how to optimize the entire solar panel system.


